Add a second device
Edge is fully usable on one machine. Pairing a second one is optional — and it is the first thing you do that puts bytes on a network, so this page spends most of its length on what those bytes are and who can see them.
Know what changes before you pair
The app states this itself, in the dialog that appears when you turn off Local-only mode:
“Your files, models and extraction stay on this device. Sync and messaging are different: they always cross the network. They travel encrypted, direct or through an Armore-operated relay, which can see THAT your devices talked — not what they said.”
| What | Where it is after you pair |
|---|---|
| Your files | This device |
| Models | This device |
| Extraction / inference | This device |
| Sync | Crosses the network, encrypted |
| Messaging | Crosses the network, encrypted |
Local-only mode is on — "<action>" would send data to <target>, off
      your device. Turn off Local-only mode to allow it.
If you are not ready to
accept the row above, leave it on and skip this page — nothing else stops working.
Start the pairing in the app
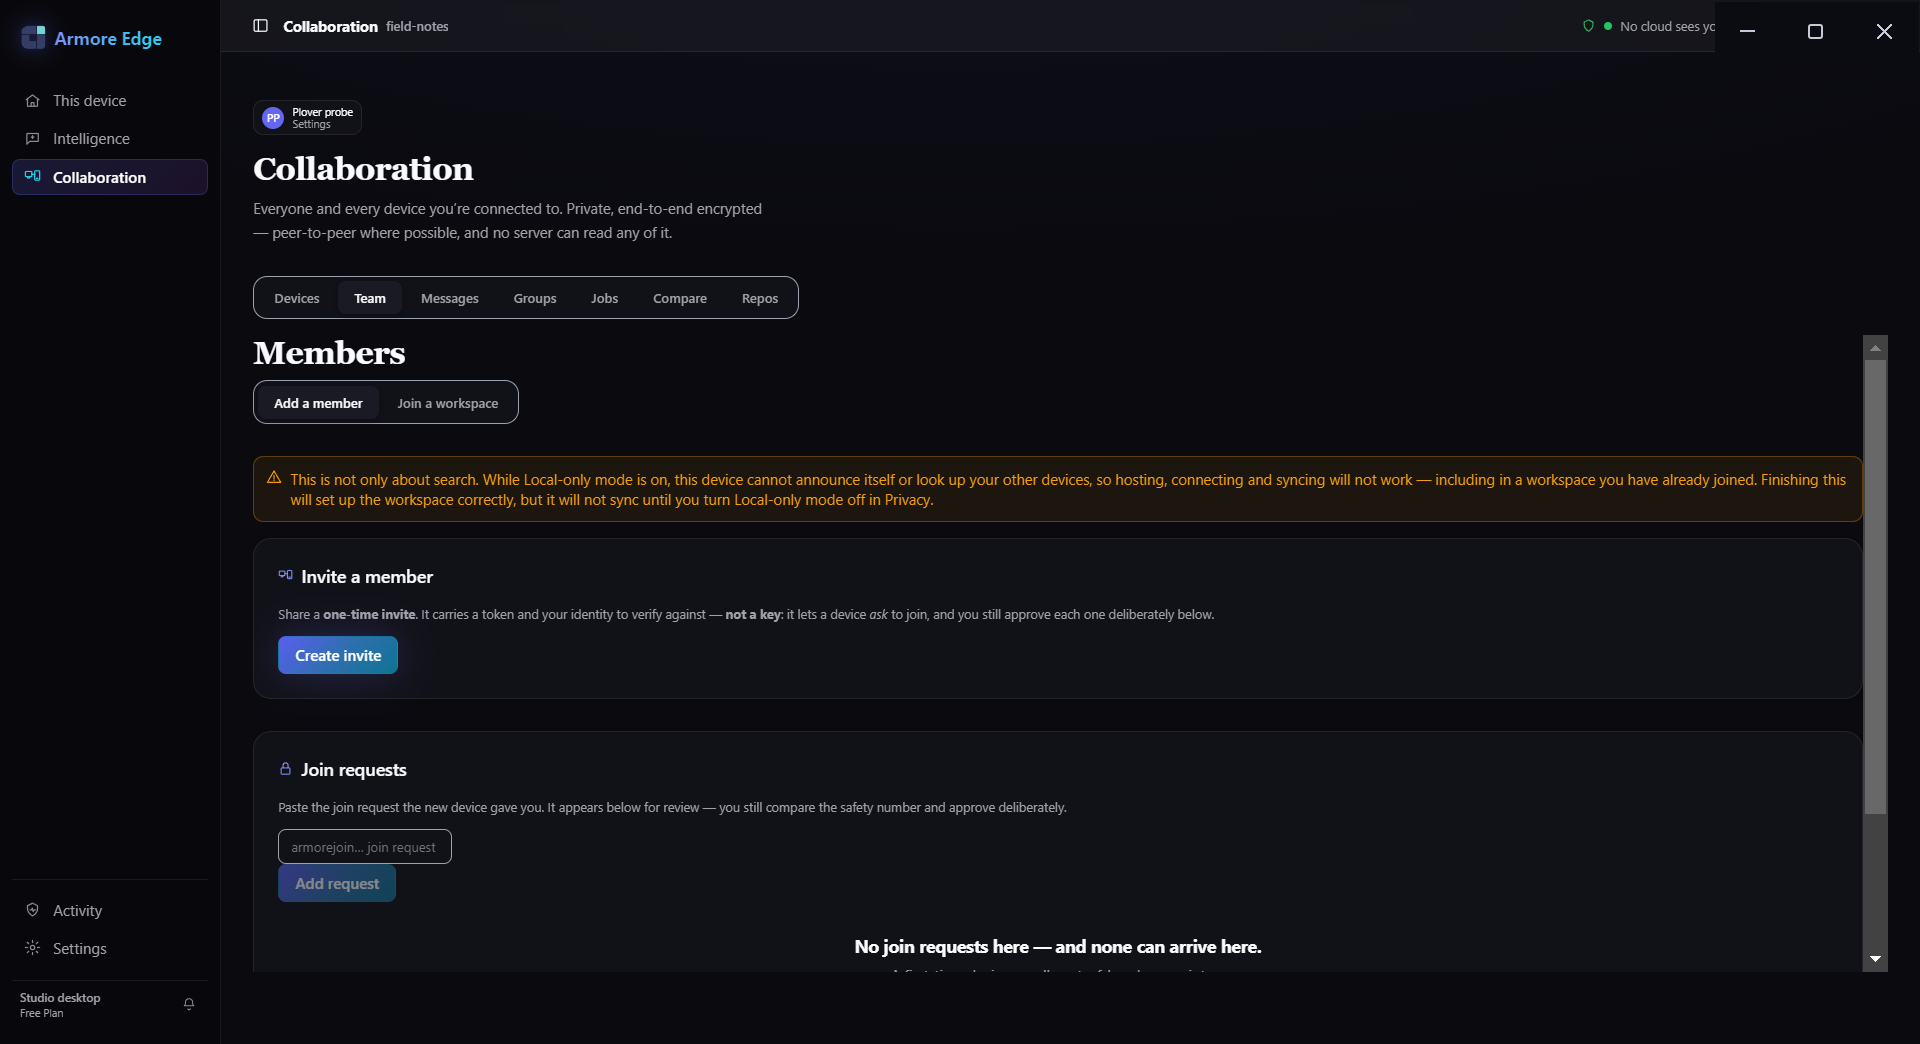
Look for the card titled Add a device to your fleet, under Collaboration. Its own one-line summary is “Bring another device into your workspace — they sync end-to-end encrypted — no server sees your content.” Read “content” strictly there — the relay still sees the envelopes, which is Step 4. It offers two buttons, and you need one of each across the two machines:
- Add a member — on the machine that already holds the workspace. It opens an Invite a member panel with a Create invite button.
- Join a workspace — on the machine that is coming in.
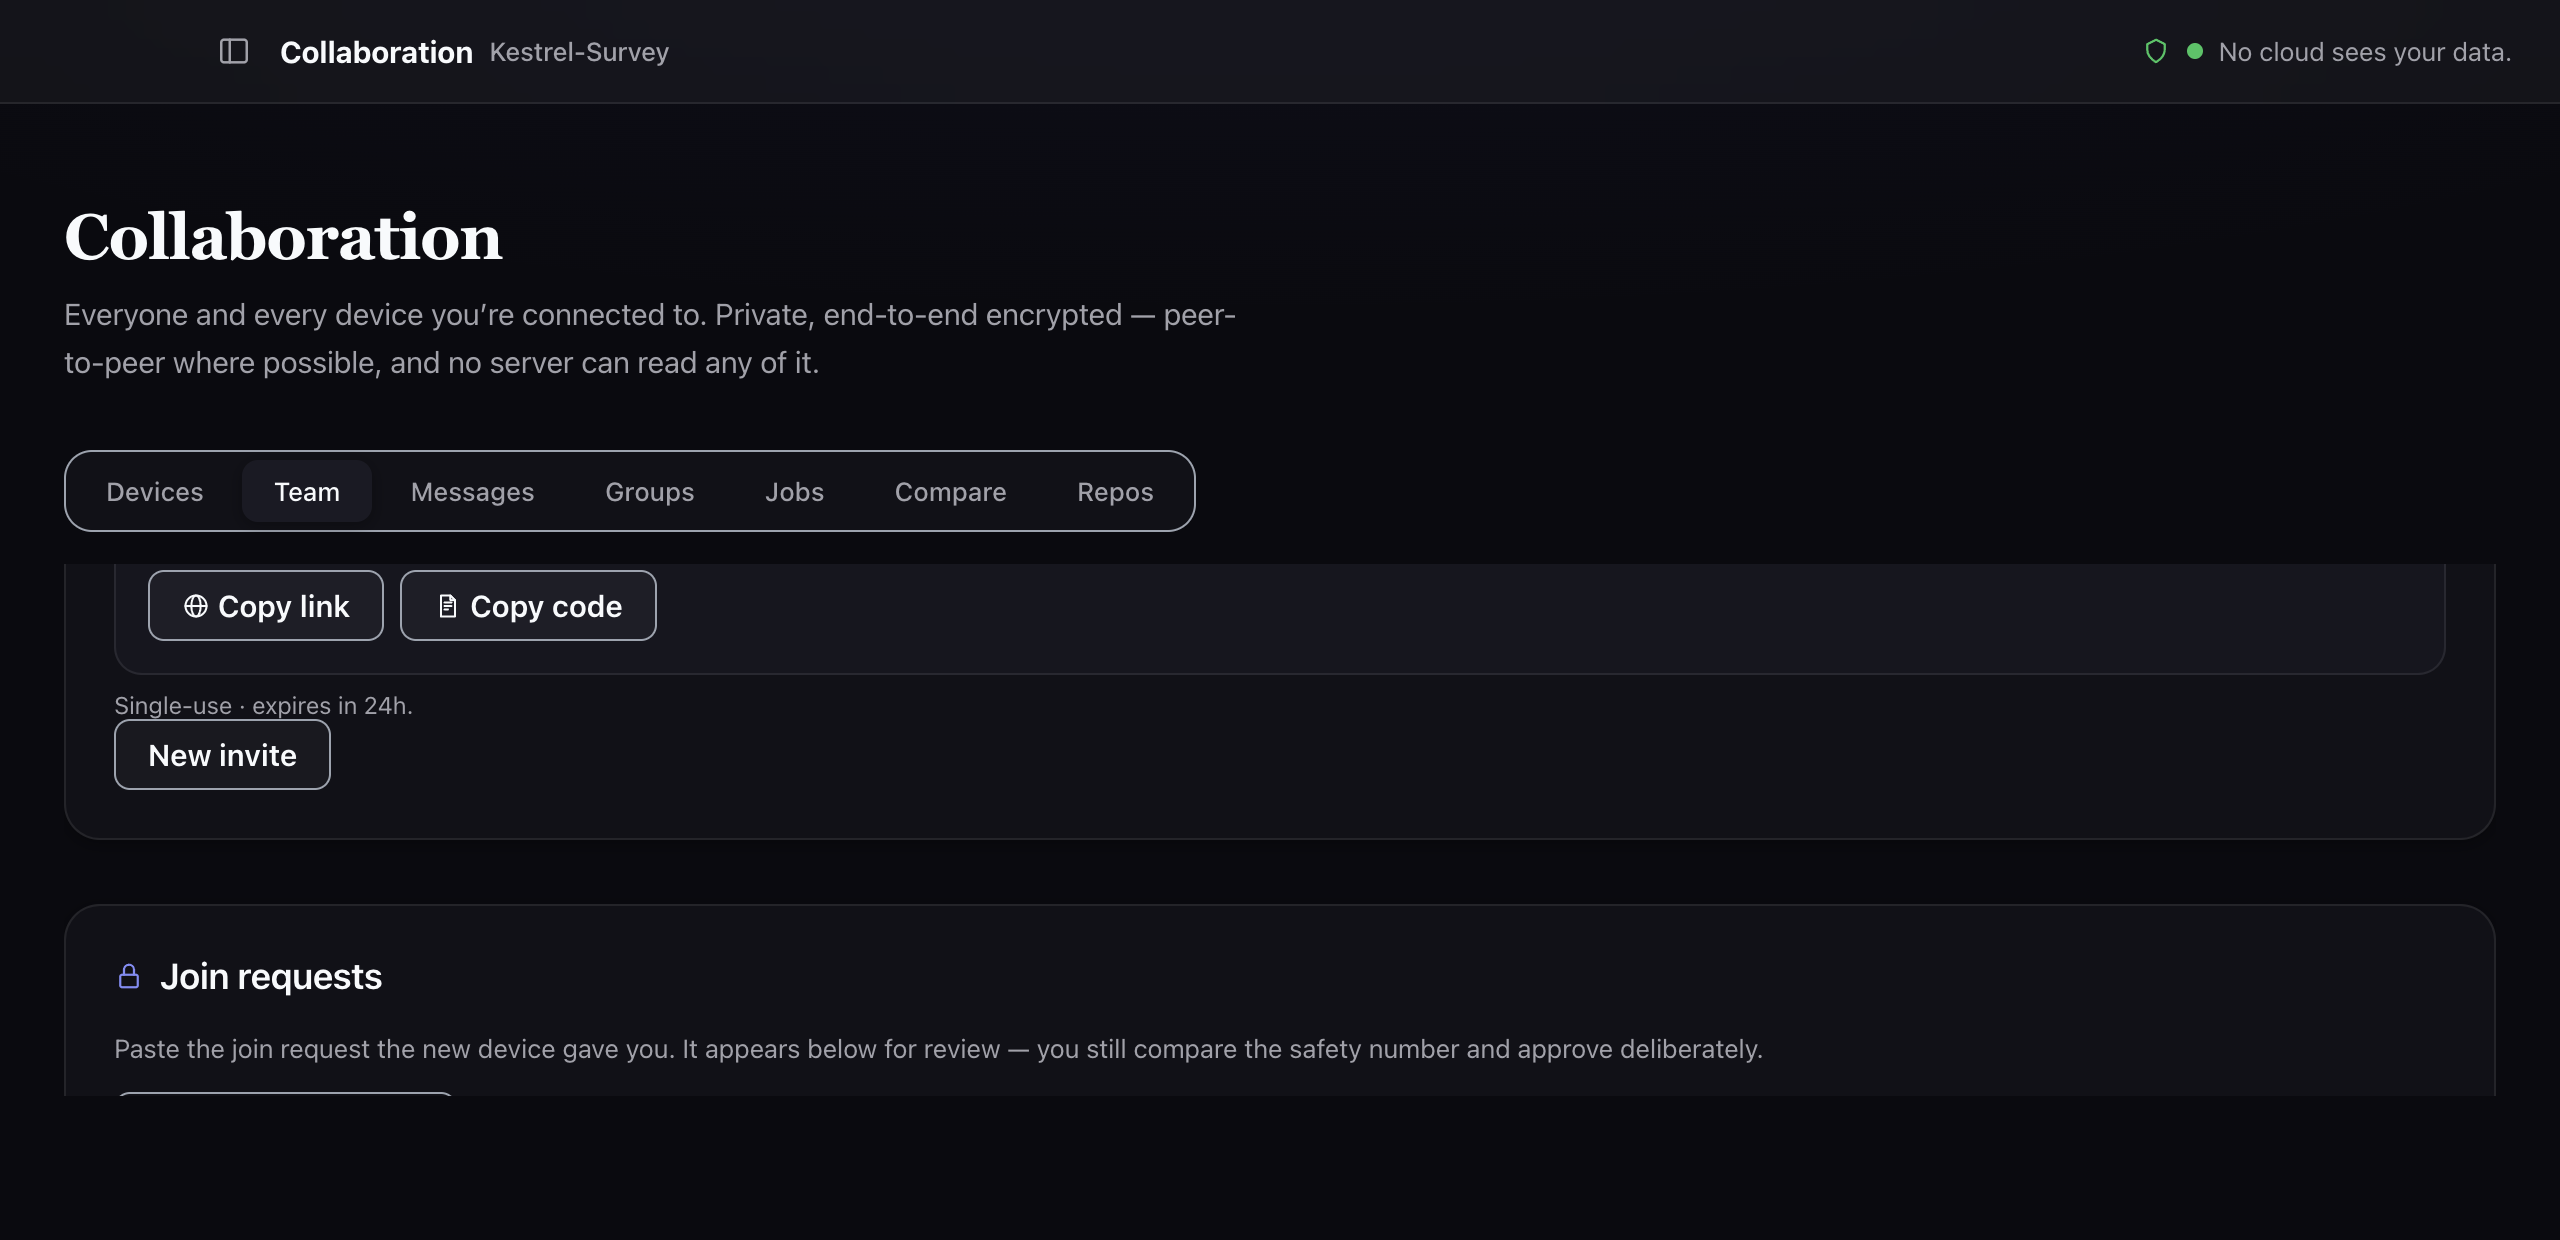
The invite side walks you through exactly three steps:
- “Share this code with the other device.” (there is a Copy invite code button)
- “On it, choose Join a workspace and paste the code.”
- “Their request appears here to approve — one tap and they're in.”
On the joining machine you paste the invite code, send the resulting join request back, and then paste the admin's approval into the Approval from the admin field to Finish joining. While you wait, that machine shows “Waiting for the admin to approve.”
The same enrolment exists in the CLI, under different names:
armore auth login --enrollment-token armore2.… emits the join request,
and the admin's reply goes into armore auth accept armoregrant2.…. Hand a
damaged code to either and it says so rather than half-joining:
$ armore auth login --enrollment-token 'armore2.notareal.invite' --json
{"error":"invite code is damaged (characters missing or changed) — ask for the
 whole thing again","ok":false}
# exit 1
Compare the number. This is the step that matters.

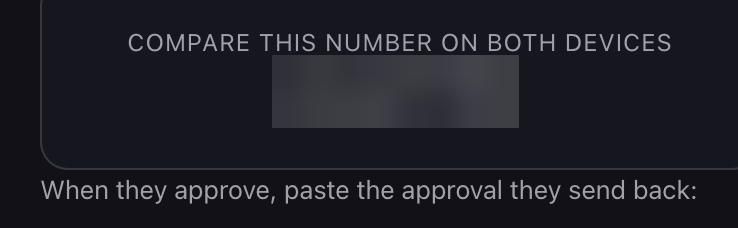
The joining machine shows a short number next to its request. The app tells you precisely how to get it to the other side, and the instruction is unusually specific for a reason:
“Send this request to the admin, then read the number below to them aloud, on a call — not over this chat, a screenshot or a shared screen.”
The number's whole job is to be carried over a channel an attacker is not already sitting in. Pasting it into the same chat that carried the invite defeats it. If the two numbers do not match, stop and do not approve.
On the admin machine the same ceremony appears as a join request waiting to be reviewed, above a panel asking you to compare this number on both devices. The app asks the admin to have the joining device read its number aloud, and it offers “They don't match — discard” as a first-class button rather than burying it below the approval.
Two details are worth knowing before you approve. The certificate binding that
device to its handle is checked when you approve, not when the request
arrives — so a request can look admissible in the list and still be refused at the
moment you accept it. And the admin panel's compare number is six
digits while the sas returned by armore mesh join above
is seven: they are different artifacts of the same ceremony, and
they are not supposed to match each other.
You do not have to take the ceremony on faith. The CLI ships the mesh pairing primitive on its own — its help calls it “the offline key-agreement half” — so you can run both ends by hand and watch a number get derived rather than issued. Each device generates a half:
$ armore mesh pair --json
{
  "command": "mesh.pair",
  "commitment": "9463109c6d11a4aee7b89adf79a342c8e89cdaa34afe0f8360e0bc8381c56b50",
  "note": "Send `commitment` to the peer first; send `reveal` only after you have
           received the peer's commitment. ...",
  "ok": true,
  "pairing_version": 2,
  "reveal": "0dc6b6833a24a35f83de7add4806602c1830755d6f773420d61ddcb2d1ca9517…"
}
Each device then runs the agreement against the peer's two halves. Here is the join side, run against the halves above:
$ armore mesh join \
    --peer-commitment 9463109c6d11a4aee7b89adf79a342c8e89cdaa34afe0f8360e0bc8381c56b50 \
    --peer-reveal 0dc6b6833a24a35f83de7add4806602c1830755d6f773420d61ddcb2d1ca9517… \
    --json
{
  "agreed": true,
  "command": "mesh.join",
  "our_commitment": "7d198f0e079fe38491cdfdec90a96af6681a51cf32ffb8546dc323a6bcc210a1",
  "our_reveal": "189bc96b65655b930b683b18f7a431879195e67ffc13da555df832cb049b3834…",
  "sas": "5227322"
}
Seven digits. To see the matching number the other machine has to do the mirror of
this, which the command's own note spells out: “The peer must run its own
agreement against our_commitment + our_reveal to see the
same SAS.” The ordering is load-bearing — send your commitment first, and
your reveal only after you have the peer's commitment — and that ordering is
what makes the next block possible.
$ armore mesh join --peer-commitment <A> --peer-reveal <B> --json
{"error":"pairing agreement failed: pairing: peer's reveal does not match its
 commitment — it changed keys after committing; possible man-in-the-middle,
 abort pairing","ok":false}
# exit 1
When a direct link is not possible, a relay carries it
Two machines behind two home routers often cannot reach each other directly. When that happens the traffic is forwarded by a relay. It is worth being precise about the trade, because “encrypted” and “private” are not the same claim.
| The relay | Can it? |
|---|---|
| Read your file contents or messages | No — it forwards ciphertext |
| See which devices are talking | Yes |
| See when, and for how long | Yes |
| See how much data moved | Yes |
| See both devices' network addresses | Yes |
That is inherent to relaying, not a choice we made badly — a box that forwards your packets necessarily handles their envelopes. It is why the app's wording is “can see THAT your devices talked — not what they said” rather than something softer.
Checking the result
The live peer list lives in the app. The CLI will tell you that directly rather than returning an empty list you might misread as “no peers”:
$ armore mesh peers --json
{"error":"`armore mesh peers` needs a live mesh node: peer discovery rides a
 running endpoint + the workspace discovery service (network egress), which the
 CLI process does not host in v1. Run the Armore app/daemon for the live peer
 list.","ok":false}
# exit 1
What the CLI can tell you is what this build is capable of, with no network involved:
$ armore mesh status
alpn: armore-edge/0.1
connected: false
net_version: 1.0.10
pairing_version: 2
reason: CLI v1 binds no mesh endpoint; the live session runs in the Armore
        app/daemon. Use `mesh pair`/`mesh join` for the offline key-agreement half.
transport: iroh
connected: false here is not a fault. It is the honest readout for
a CLI process that deliberately binds no endpoint. A paired, working fleet still
reports false from this command — look in the app instead.
Unpairing
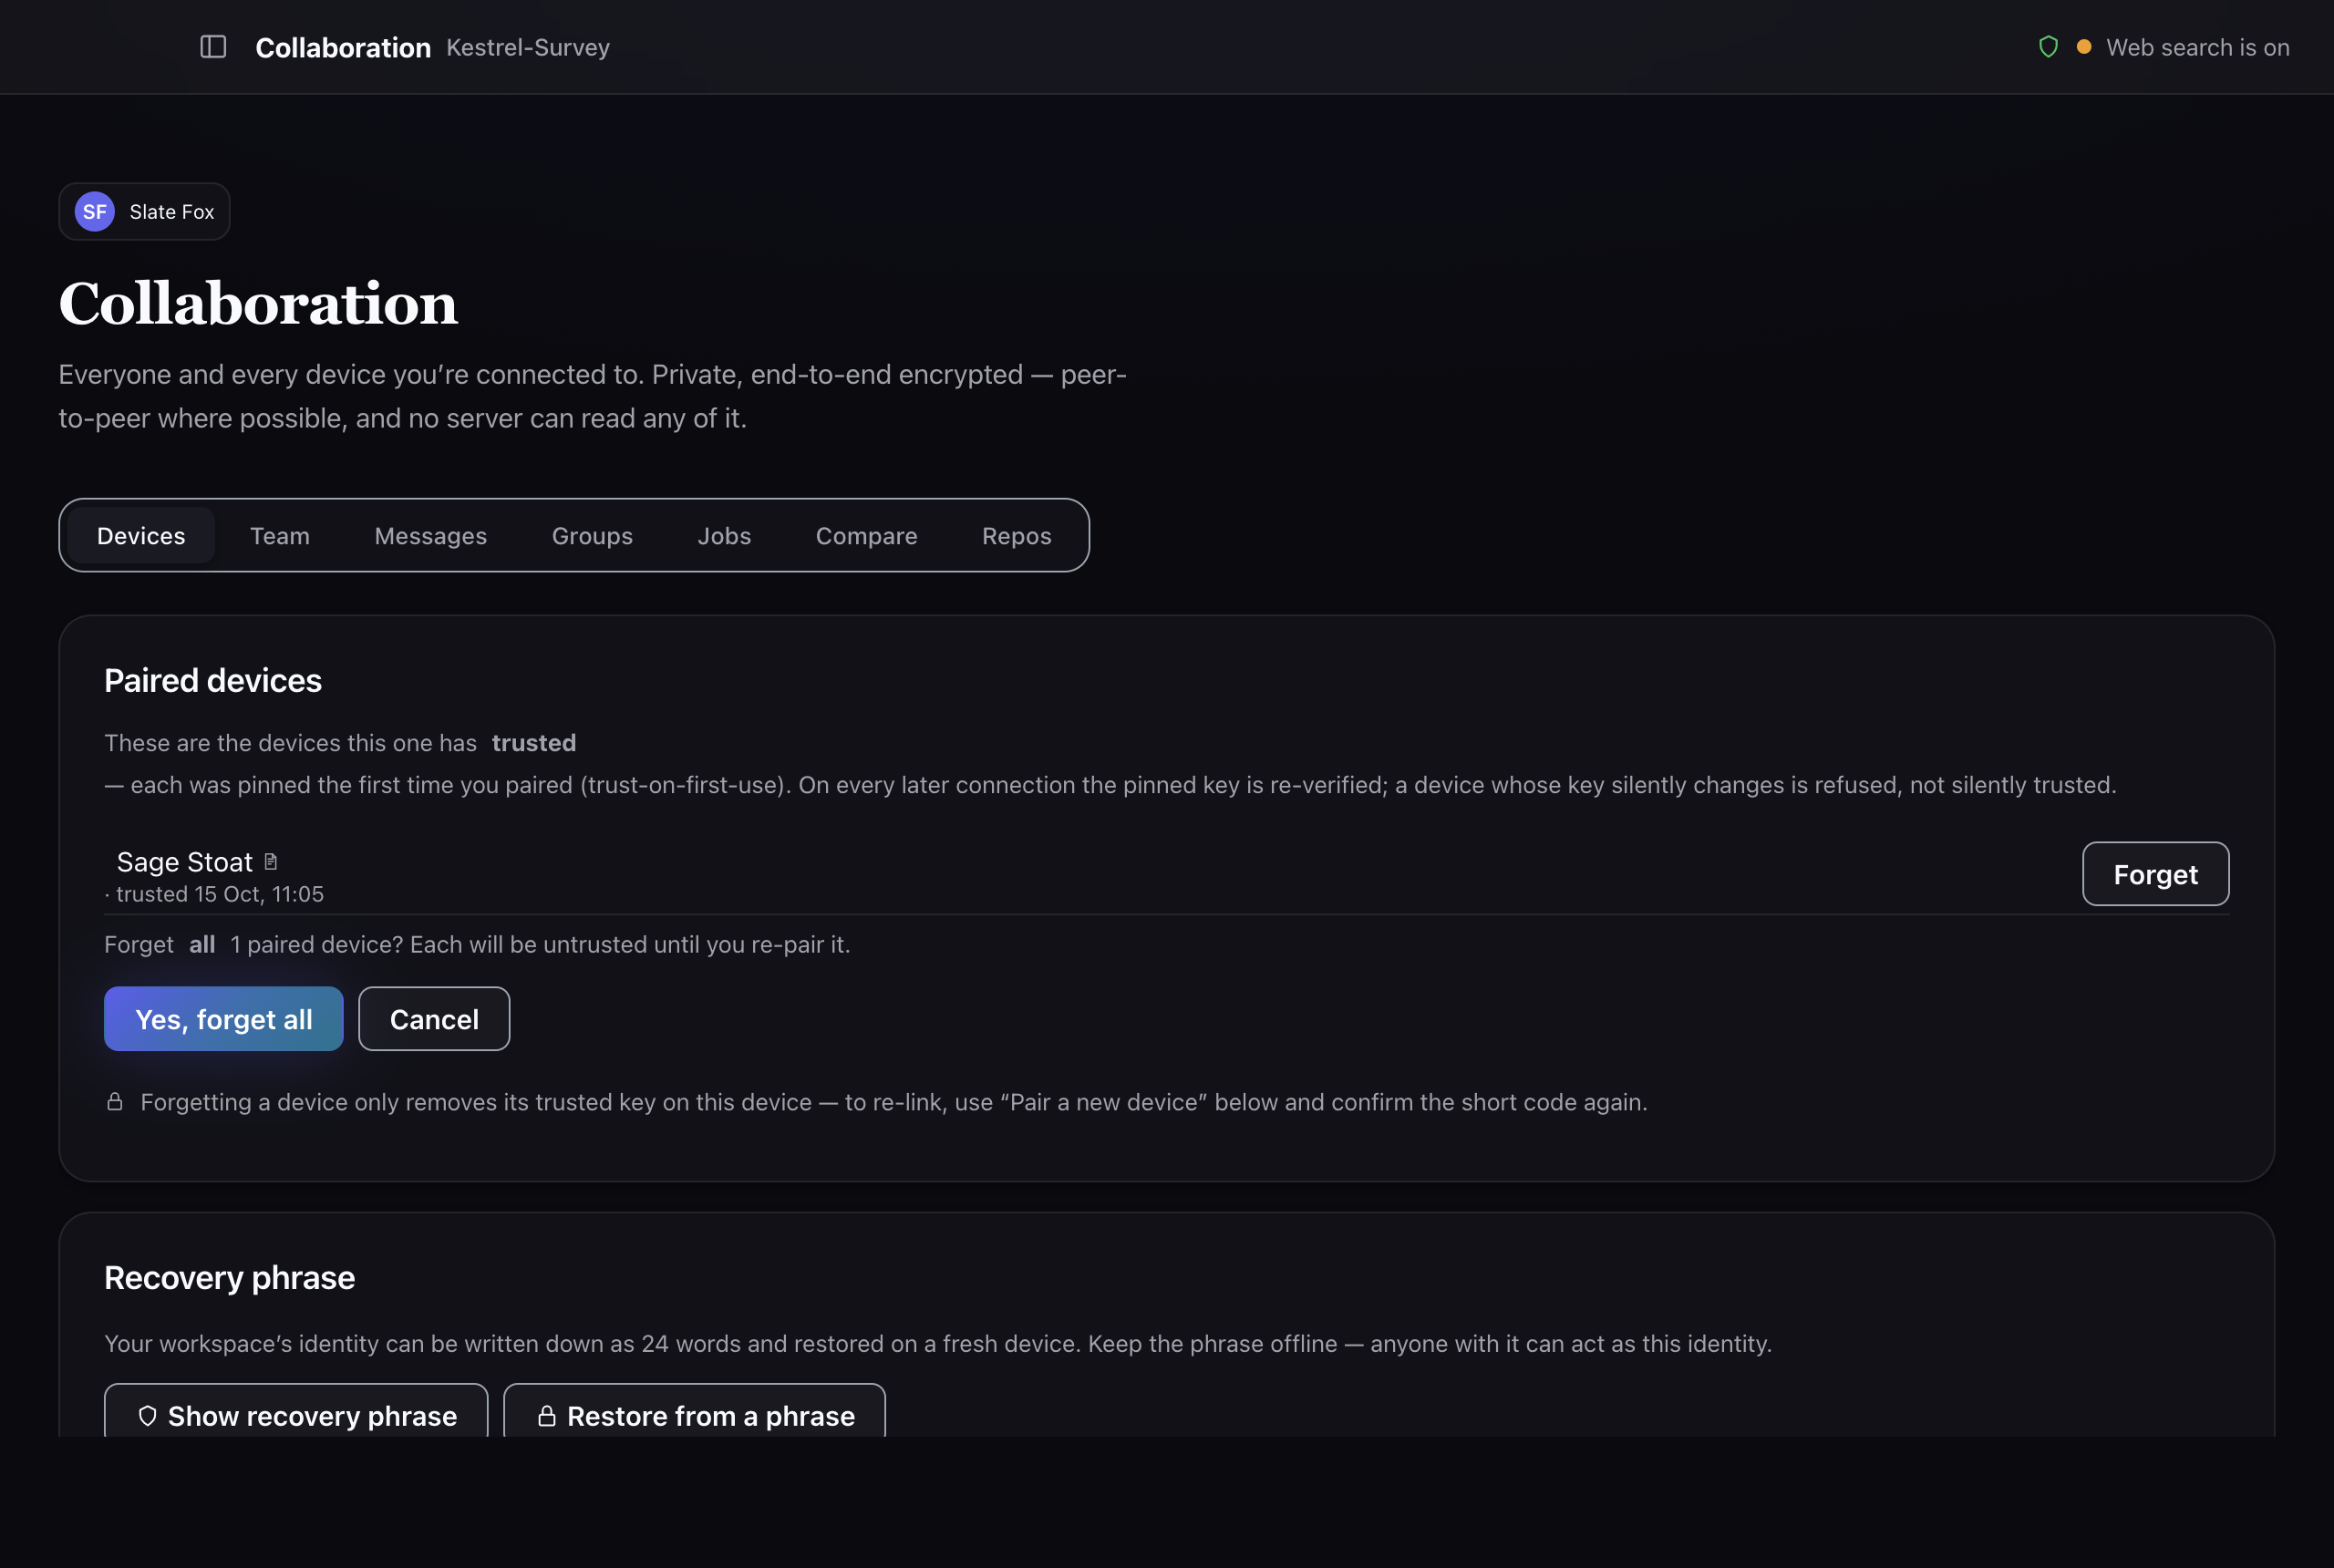
There is a Forget all devices control, and the app is careful to say what it does and does not reach:
“Forgetting a device only removes its trusted key on this device — to re-link, use ‘Pair a new device’ below and confirm the short code again.”
So it is one-directional: the other machine still holds its own key until you forget this one there too. Re-linking is a fresh pairing, number comparison included — there is no “trust it again” shortcut.
Forgetting a device is not the same as erasing what is on it. For that, see see and erase what is stored — and note in advance that the app's delete button and the CLI's data are in two directories that cannot reach each other.